Last updated November 18, 2026





Free written scope consultation - allowances, timeline, and change-order rules on paper before a single trade is scheduled
Home Additions & ADU Maintenance Schedule: What to Do and When
The caulk joint where your new addition roof meets your existing roofline will fail before almost anything else on your home, and most homeowners don’t even know to look for it. That seam is one of dozens of connection points a home addition creates, each one moving at a different rate than the structure it ties into. A home addition or ADU ages on its own clock. It has more seams, more transitions, and often different materials than the original house, which means it needs its own maintenance calendar. This guide lays out what to inspect and when: the first-year settling checklist, the North Texas seasonal rhythm of 100°F summers and drought cycles, ADU-specific items like condensate lines and subpanel connections, and the five- and ten-year milestones. We build additions in Carrollton, and what follows comes from watching these structures through their first full weather year and beyond.
Styles & brands we work with
- Kitchen remodeling
- Bathroom remodeling
- Home additions & ADU
- Roofing
- Windows & doors
- Driveway & pavers
- Fence
Quick Answer
Inspect a new home addition or ADU at least twice a year and after every major storm. The first year needs the most attention: check drywall seams at structural connections, exterior caulk joints, and door and window operation at the one-month, six-month, and twelve-month marks. After that, follow a seasonal schedule that accounts for North Texas thermal expansion and drought, then step up to five- and ten-year milestones for repainting, re-caulking, and HVAC service sized to the addition’s square footage. Log every inspection and repair; that documentation protects your workmanship coverage and adds recorded value at resale.
Table of Contents
- Why an Addition Ages Differently Than the Rest of Your House
- The First-Year Checklist: What to Inspect During the Settling Period
- North Texas Seasonal Maintenance: Heat, Drought, and the Connections Between
- ADU-Specific Maintenance: Condensate Lines, Subpanels, and Moisture Barriers
- Five- and Ten-Year Milestones: Repainting, Re-Caulking, and HVAC Loads
- How to Build a Maintenance Log That Protects Your Coverage
- Common Mistakes to Avoid
- When to Call a Professional
- Frequently Asked Questions
- The Bottom Line
Why an Addition Ages Differently Than the Rest of Your House
Your original house has had years to settle, shift, and finish doing whatever it was going to do. A new addition hasn’t. It’s tied into a structure that finished moving long ago, and the two don’t move together. The foundation under the addition is new; the framing that meets the old wall is old. Seasonal movement pulls on every place they touch.
Count the connection points on a typical addition: the roof-to-wall transition where the new roof meets the old one, the wall-to-wall seam, the floor-to-floor joint, the exterior caulk lines at the base and the header, and every door and window in the new envelope. Each one is a place where two assemblies with different movement histories have to stay sealed and straight. Most of them will do exactly that if you inspect them on a schedule. The ones nobody checks are the ones that fail quietly and show up later as a stain on a ceiling or a soft spot in a wall.
The materials compound it. An addition might use engineered framing that expands differently than the original dimensional lumber, or a mini-split system that cycles more often than the central HVAC because it serves a smaller, tighter space. Even the raw materials matter: the concrete in a new slab or patio pad from a Quikrete or Sakrete mix cures and shrinks on its own timeline, and that shrinkage shows up at the seams. We’ve watched plenty of additions go through their first Carrollton summer. The ones that hold up are almost never the ones with the best materials. They’re the ones where somebody looked at the right joints at the right time.
This is the premise of the whole guide: build the addition a calendar of its own, not a copy of the routine you run on the original house.
The First-Year Checklist: What to Inspect During the Settling Period
The first twelve months are the settling period. Expect small cosmetic changes; they’re normal and mostly harmless. What you’re watching for is anything that keeps changing after the one-month mark or any gap that lets water in. Set a reminder for months one, six, and twelve.
At month one
- Walk the drywall seams where the addition joins the existing wall and check the ceiling-to-wall line in every new room. Look for hairline cracks along those seams specifically. Hairlines at structural connections are common and usually cosmetic; longer diagonal cracks or cracks that widen week to week are worth a call.
- Press on the exterior caulk joints at the roof-to-wall transition, the base of the addition walls, and around every new window and door. Fresh caulk should feel firm and continuous. Gaps, bubbles, or a bead that pulls away from the wall mean the joint is moving more than the caulk can take.
- Open and close every new door and window, including the ones you rarely use. They should latch smoothly and not drag. Doors that stick in the first month often free up; doors that stick worse by the sixth month point to movement that needs a look.
- Check the floor transition where new flooring meets old. A slight lip change from settling is normal. A growing gap or a buckle is not.
- Note the HVAC registers in the addition. Airflow should feel comparable to the rooms it shares a thermostat with. Weak flow in a new wing usually means a duct sizing question, not a waiting problem.
At six and twelve months
Repeat the same walk. The purpose is comparison. A caulk joint that looks the same at month six as it did at month one is doing its job. One that’s split further tells you the connection between the new and old structure is still moving and may need a flexible sealant with more movement tolerance. Drywall cracks that re-open after patching at month six are the classic signal to call the builder rather than patch again. Doors and windows should be back to opening cleanly by month twelve; if they’ve gotten harder, the frame or the foundation under the addition is moving enough to measure.
On a recent addition in Carrollton, the only first-year issue we dealt with was a roof-to-wall caulk joint that opened at the eight-month mark, right after the first hard freeze-thaw transition of the season. That joint gets called out in every guide we write because it fails first so consistently. Inspect it at every first-year checkpoint and at least twice a year after. You can read more about how we tie new construction into existing structures on our Home Additions & ADU in Carrollton page.
North Texas Seasonal Maintenance: Heat, Drought, and the Connections Between
Carrollton sits where summers run to 100°F and higher and rain arrives in violent bursts with long dry stretches between. That combination is brutal on the seams in a home addition, and it makes the maintenance calendar seasonal in a way a generic national checklist never captures.
Thermal expansion is the big one. During a July heat wave, roof decking, fascia, and siding on the addition expand measurably, and the original structure expands too, just on a different cycle and at a different rate. Every connection between the two absorbs that difference. Where a rigid sealant was used on a flexible joint, it cracks. Where the flashing at the roof transition is nailed too tightly, movement works the fasteners loose. That’s why the roof-to-wall caulk joint fails first and why spring and fall are the best times to inspect it: catch the opening before the next weather cycle pushes water through it.
Foundation moisture during drought cycles is the second half of the equation. When soil dries and shrinks under part of a foundation, that part drops slightly while the rest holds. In a home addition, the new and old foundations can react differently to that shrinkage, and the connection is where you’ll see it. Our own guidance for North Texas homeowners, and what we tell every client we build for:
- Water the foundation on a consistent schedule through July, August, and September, aiming for even moisture around the entire perimeter, not just the new wing. Soaker hoses set on a timer beat occasional deep soaking every time.
- Keep gutters and downspouts clear so roof runoff lands away from both the original foundation and the addition’s. Pooling at a corner is the fastest way to uneven movement.
- After every major storm, walk the perimeter and check the new caulk joints and the roof transition before the next rain. North Texas storms find the weak points.
- In winter, watch the freeze-thaw transition in late December and February; that’s when seals that held through summer finally open.
The same climate weights our other exterior work. If you’re planning concrete steps or a patio pad off the new wing, the freeze-thaw and heat cycles drive the way we spec mixes with brand partners like Quikrete or Sakrete, and the installation approach in our Driveway & Pavers in Carrollton service is built around the same seasonal realities.
ADU-Specific Maintenance: Condensate Lines, Subpanels, and Moisture Barriers
An accessory dwelling unit packs a full building’s systems into a small footprint, and that concentrates maintenance in a way a normal addition doesn’t. Four items deserve their own recurring check.
- Dedicated mini-split condensate lines. Most ADUs here run a dedicated mini-split rather than tying into the main house HVAC, and the condensate line that drains it is the single most common source of water damage in an ADU. In a Carrollton summer, that system runs hard and the line carries water constantly. A clogged line backs up into the wall or ceiling, and by the time you see the stain, the damage is done. Flush it once in spring and once mid-summer; a slow drain or a bucket that’s emptier than it should be is your warning.
- Subpanel connections. An ADU usually runs its own electrical subpanel, and over time the lugs and breakers can loosen from thermal cycling in the heat. This is not a homeowner task; panel work is genuinely dangerous. Have a licensed electrician check the termination torque and breaker connections as part of an annual service visit. That one inspection prevents most of the overheating issues.
- Crawl space or slab moisture barrier. Where the ADU sits over a crawl space, check the vapor barrier at least annually for tears or gaps and make sure it covers the entire floor between the joists. Over slab, watch the perimeter for moisture staining or efflorescence; both hint at water sitting where it shouldn’t.
- The structure itself. An ADU is often detached, which actually helps the connection story but brings its own exposure: four exterior walls, four sets of corners, and roof edges on all sides. Walk the whole envelope twice a year and pay extra attention to where the roof meets the wall on the windward side.
ADUs from brand partners like Abodu and Cover carry real build quality, and none of that build quality survives a condensate line nobody flushed. This is the practical argument for a documented maintenance routine: it’s what the systems demand.
Five- and Ten-Year Milestones: Repainting, Re-Caulking, and HVAC Loads
Past the settling period, the calendar shifts from frequent small checks to a few larger, predictable events. Here’s the schedule we recommend for a home addition or ADU in Carrollton:
- Year 5: Budget for a full exterior repaint. In North Texas sun, exterior paint and sealer break down faster than they would in a milder climate, and five years is a realistic cycle for the addition’s siding and trim. Do it in fall when the weather is stable.
- Year 5: Plan a professional exterior re-caulk at all joints, not just the failing ones. Re-caulking the whole envelope at once costs less than chasing individual failures, and it resets the clock on the roof-to-wall transition.
- Year 5: Schedule a full HVAC service on every system serving the addition, specifically sized to the new square footage. If the addition added a dedicated unit or mini-split, the service should include the addition’s own equipment and duct run, not just the main house. A tune-up that ignores the new wing is a tune-up of the wrong system.
- Year 10: Expect to repaint and re-caulk again, and to replace weather stripping and door sweeps at the addition’s exterior doors. That’s your second full exterior cycle, and the time to re-inspect the roof transition and flashings with a closer look than a walk-by gives you.
- Every year between: Annual HVAC service, biannual caulk and joint inspection, storm checks, and the ADU condensate flush if you have one.
The HVAC point is worth repeating to anyone planning to do the job themselves. A service contract written for the original square footage doesn’t cover the load an addition added. Confirm the addition’s equipment is on the service invoice every time; you’ll otherwise pay for maintenance on equipment much older than the addition, and the new equipment will age untouched.
How to Build a Maintenance Log That Protects Your Coverage
A maintenance log sounds like paperwork for paperwork’s sake. It isn’t. It’s the file that shows what was inspected, what was corrected, and when; useful to you in scheduling, useful to any contractor you call later, and useful at resale when a buyer asks what’s been maintained. And documented maintenance is exactly what workmanship guarantees are built around. Our 730-Day Done Right Promise is a written commitment, and when a question comes up, a clear record of what was checked and when settles it faster than any recollection.
Build the log in a simple spreadsheet or a bound notebook. One page or tab per home system. Every entry gets four fields: date, what you inspected or repaired, what you found, and what you did about it. Photograph anything seam-related; pictures of a caulk joint at month one and month twelve are worth more than a paragraph of description. Keep receipts for every professional service, HVAC included. Save the builder’s original closeout materials, which include any warranties or manufacturer documents for the addition’s windows, roofing underlayment, and equipment.
Two more tips from our experience. First, tie inspections to the calendar year, not to memory: your log should line up with the seasonal schedule above, so that fall repaint and spring condensate check are both entries on the page. Second, hand a copy to your eventual buyer during the sale process. A documented addition is a less risky addition to an insurer and a lender, and the record you kept protects the resale story. If you’re weighing what a documented, well-maintained addition does for resale values around Carrollton, our Fence Installation in Carrollton guide covers neighborhood-specific value considerations that apply to exterior maintenance generally.
Common Mistakes to Avoid
- Patrolling only the new construction and ignoring the joint. The roof-to-wall transition and the old-wall seam are where almost every problem starts. Walk them first, every time, before you check anything else.
- Treating first-year drywall cracks as a defect to patch and forget. Hairline cracks at the connection are normal; cracks that re-open after patching are a signal about movement. Patch once and observe; if it comes back, call.
- Using the wrong sealant on moving joints. A rigid exterior caulk on the roof-to-wall transition is set up to crack in a Carrollton summer. Flexible, paintable sealant appropriate for the joint’s movement is the correct choice, and re-sealing without checking the flashing underneath hides a problem instead of fixing it.
- Watering only the new foundation, or not at all during drought. Uneven moisture under a home split between new and old foundations stresses the connection between them. Even coverage around the whole perimeter, on a schedule, is the goal.
- Skipping the ADU maintenance because it’s a separate building. A condensate line or a loose subpanel connection in an ADU you rarely enter is the classic slow-burn failure. Put it on the same calendar as the main house.
- Servicing the HVAC without including the addition’s equipment. A tune-up that misses the unit serving the new square footage leaves the most expensive new equipment in the house without a service history.
- Re-caulking over a joint you haven’t checked carefully. Fresh caulk over a gap in flashing or a cracked seam looks great and traps water underneath. Check the assembly before you dress it.
When to Call a Professional
Some of this guide belongs on your weekend list. The items that involve sealed systems or dangerous components belong with a pro. Call a professional when you find a drywall crack that re-opens after patching, when an exterior caulk joint is consistently splitting through the flexible sealant, or when a roof transition is leaking after a storm; those point to movement or flashing issues that a cosmetic fix won’t hold. Call an electrician, without exception, for any subpanel concern at an ADU – panel work is dangerous and needs a licensed tradesperson. Have an HVAC tech handle the addition’s condensate line and equipment service if you aren’t certain how to check it. And for structural concerns, a foundation issue, or any major repair, get a written scope before anyone starts. Groundwork Construction Co. of Carrollton offers free estimates in Carrollton; call (844) 560-0925. Our phone is answered by a live person 24/7.
Frequently Asked Questions
At least twice a year, plus once after every major storm and at the month-one, six, and twelve checkpoints during the first year. The most important spots are the roof-to-wall transition, the exterior caulk joints, and the drywall seams at structural connections. Call (844) 560-0925 if you want a professional walk-through; estimates in Carrollton are free.
Because it’s the joint with the most movement between two structures that expand and settle at different rates. In Carrollton’s heat and freeze-thaw cycles, a rigid sealant there cracks sooner than any other joint on the addition. Inspect it in spring and fall and after storms, and have it re-sealed when you see a split.
An ADU has its own dedicated systems, and each one needs its own check. The mini-split condensate line, the subpanel connections, and the crawl space or slab moisture barrier are the three items most often missed. Flush the condensate line twice a year and have a licensed electrician inspect the subpanel annually.
Yes, and during a Carrollton-area drought, even coverage around the whole perimeter matters most. When soil dries and shrinks unevenly, the new and old foundations under a home addition can move slightly differently. A consistent foundation watering schedule in July through September, plus keeping gutter runoff away from the house, is the practical defense.
It gives you a documented record of inspections, repairs, and service dates, which is exactly what you’d want on hand when a workmanship question comes up. It also adds recorded, documented value at resale. Keep photos of every seam inspection and every service receipt.
No. North Texas sun breaks down exterior paint and sealant on a faster cycle than most national checklists assume, and five years is the realistic cycle for the addition’s siding and trim in Carrollton. Budget the repaint and the full re-caulk in the same year and do them in fall. Call (844) 560-0925 for a free estimate on the repaint and re-caulk.
The Bottom Line
A home addition or ADU needs its own maintenance calendar because it has more connection points and a different movement history than the original structure. The roof-to-wall caulk joint is the first thing to fail and the first thing to inspect. The first year is your settling period; check the drywall seams, exterior joints, and door and window operation at months one, six, and twelve. After that, follow the North Texas seasonal rhythm, keep an eye on the ADU systems, and hit the five- and ten-year exterior repaint, re-caulk, and HVAC milestones. Log everything. A well-maintained addition is a documented addition, and documented value holds up at resale. Groundwork Construction Co. offers free estimates for any of the work in this guide, with upfront pricing, 730-Day Done Right Promise coverage, and $1,000 off projects over $10,000. The work comes from background-checked, uniformed technicians with up to 12 years of experience, and our brand partners across every trade are chosen for the long horizon. Built to last, backed in writing.
Ready to plan a home addition or ADU in Carrollton, or get a professional inspection of an existing one? Call Groundwork Construction Co. of Carrollton at (844) 560-0925 to schedule your free project estimate, and ask about 0% financing for 18 months.
Written by the team at Groundwork Construction Co. of Carrollton.
See the difference
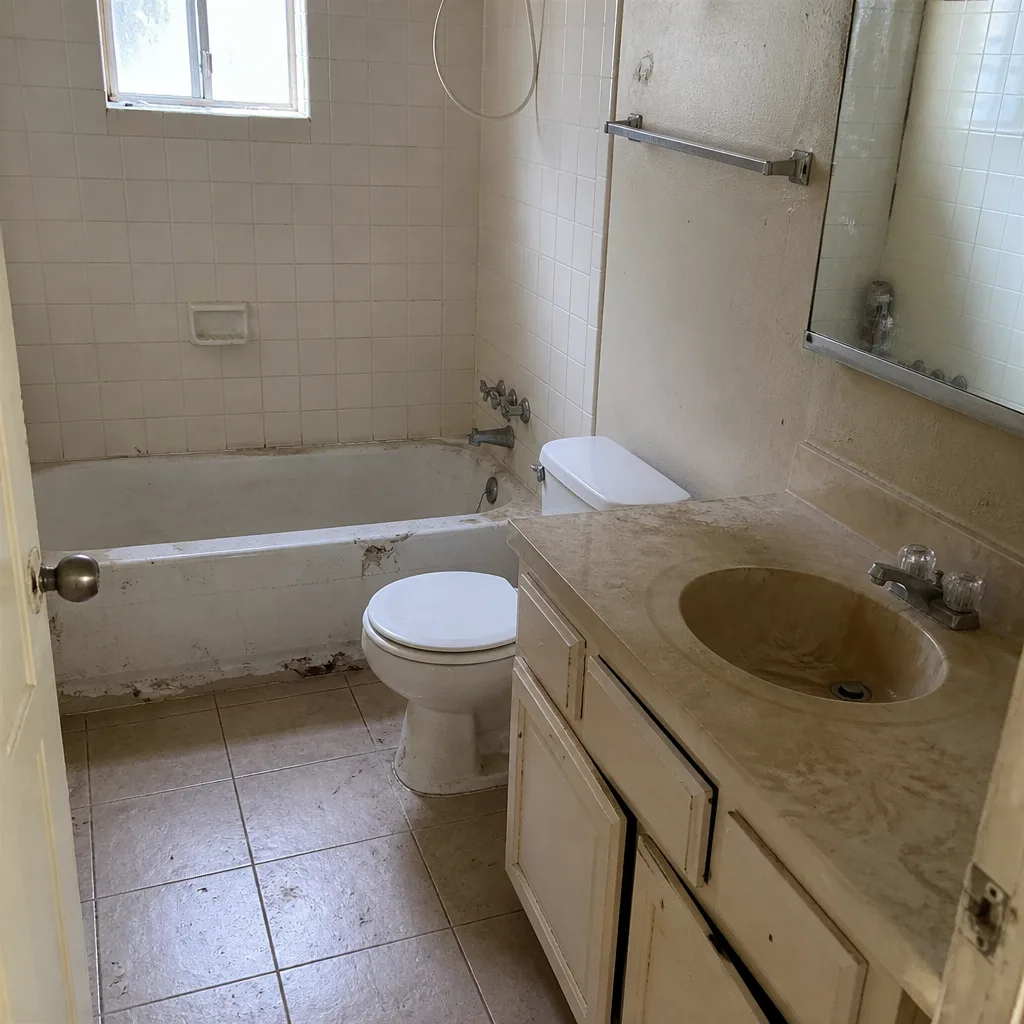 Before
 After
 Before
 After
 Before
 After